Prophet Rev2 Keyboard: Right Panel Removal
Removing or replacing the right panel board in the Prophet Rev2 is easy, and only requires a screwdriver.
Tools needed: Phillips head screwdriver, possibly a thin-bladed flathead screwdriver, and some duct tape or masking tap.
Getting inside the Prophet Rev2:
1. First, unplug all power/MIDI/USB/audio/pedal cables.
2. To remove the right panel board you’ll first need to remove some of the knobs. Going from left to right you’ll need to remove all the knobs from Parameter and Sub Octave and everything to the right of them.
3. To remove the knobs, pull straight up. They are tight but not attached so they just slide on and off by hand, DO NOT twist the knobs.
4. If it is difficult to remove the knobs, a flathead screwdriver wrapped with a thin layer of duct tape or masking tape can be used to assist you. The tape will protect both the top panel and the knob from damage. Slide the screwdriver between the bottom center of the knob and the top panel. Turn the screwdriver a small amount. Only a slight twist is required. Once the knob has moved a short distance it is easily removed by hand. Repeat the process as necessary.
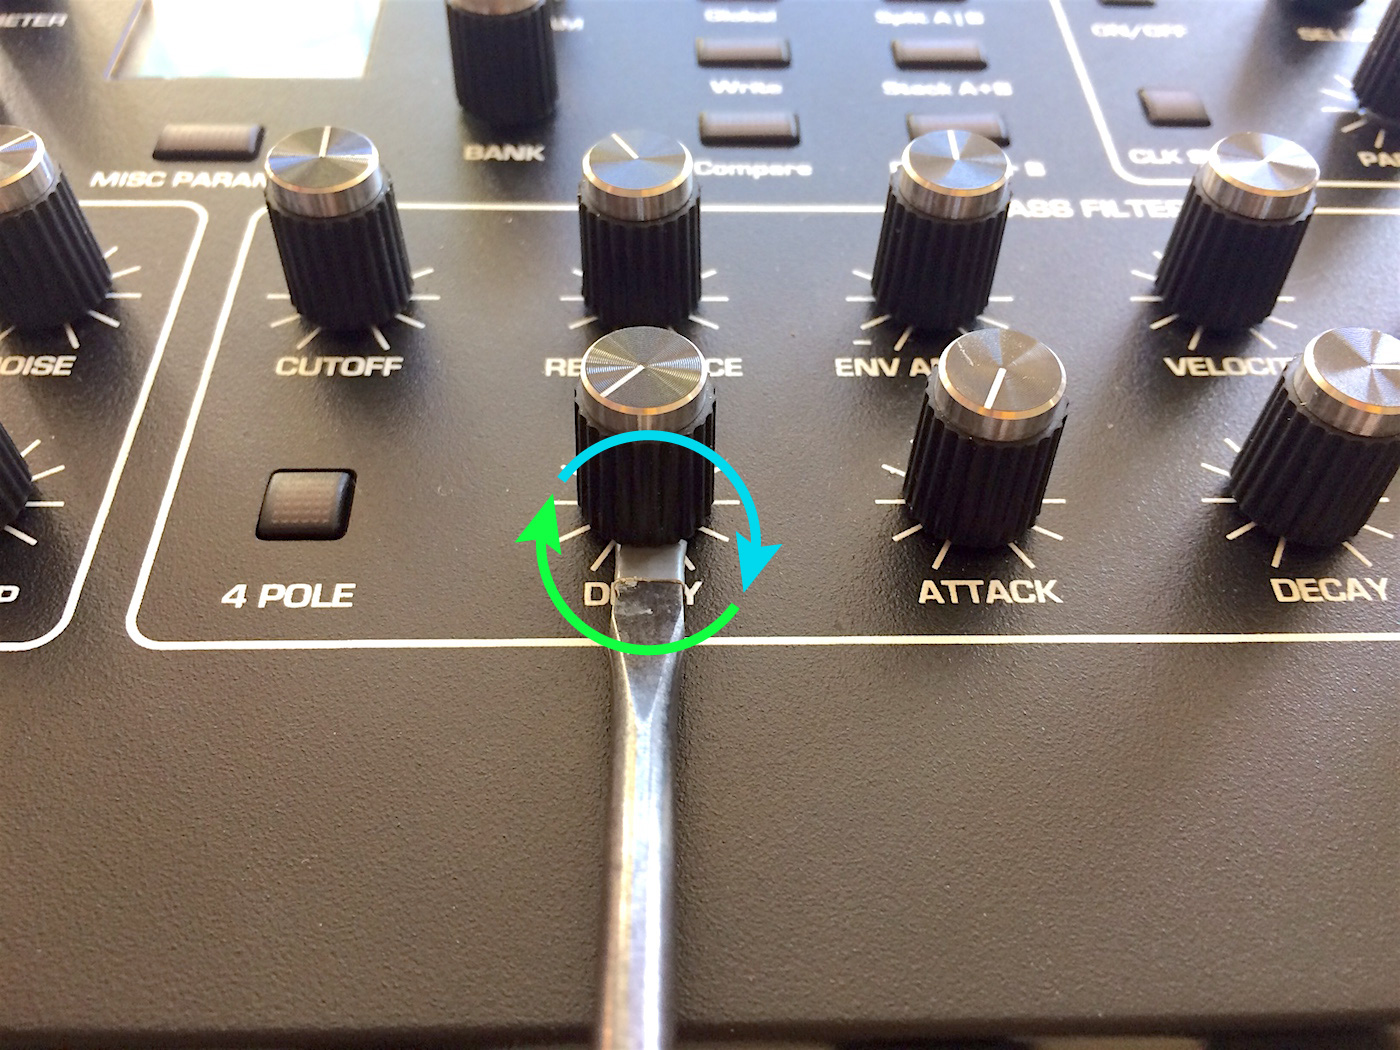
Rev2 Knob Removal
5. Now remove the 3 screws from each of the wooden sides.
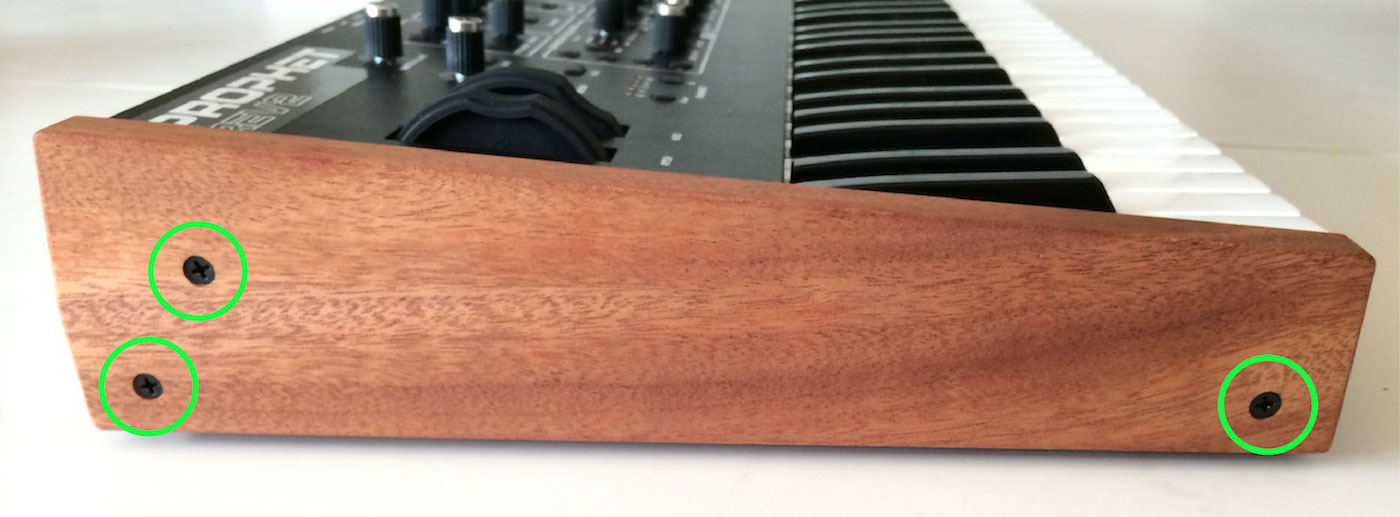
Left Wooden Side
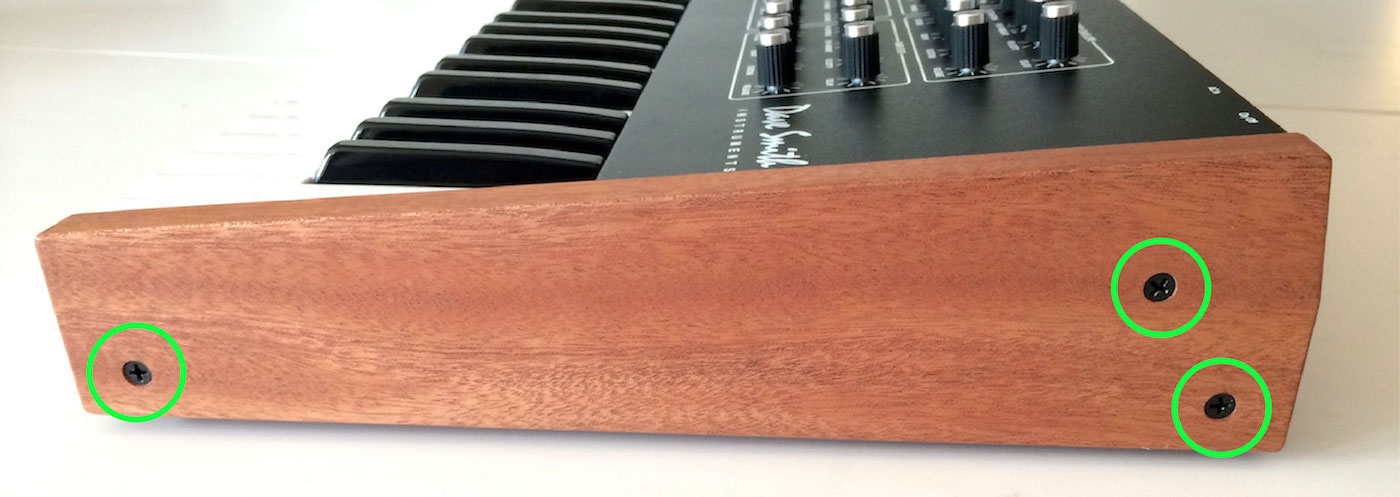
Right Wooden Side
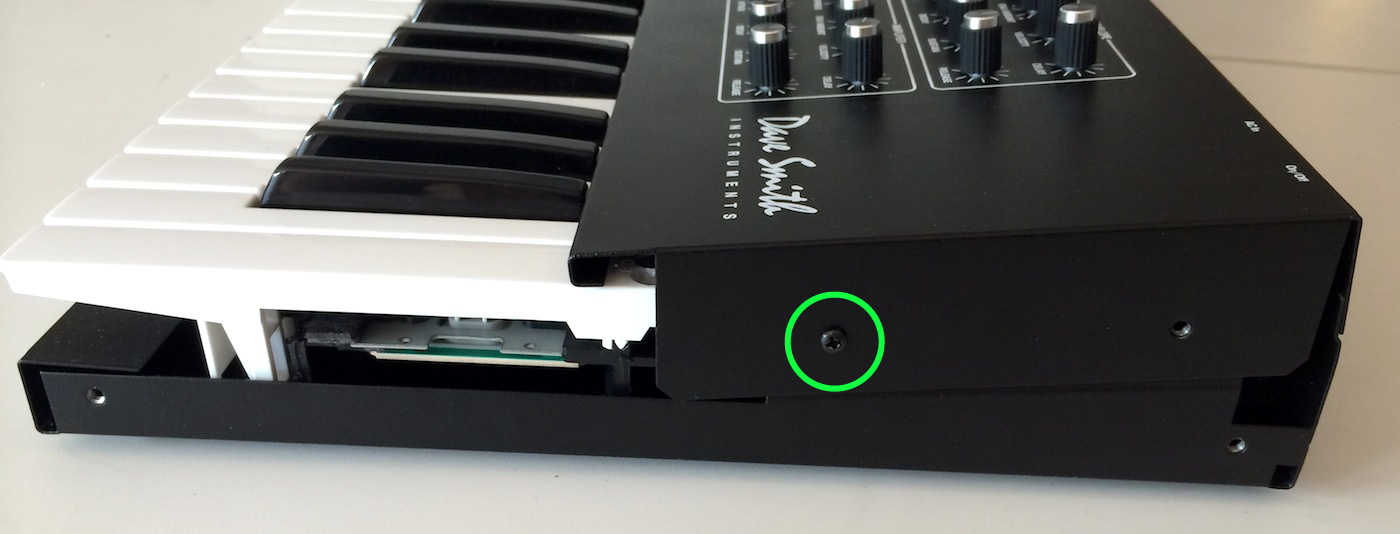
6. Underneath each wooden side, remove the 1 remaining screw from the metal.
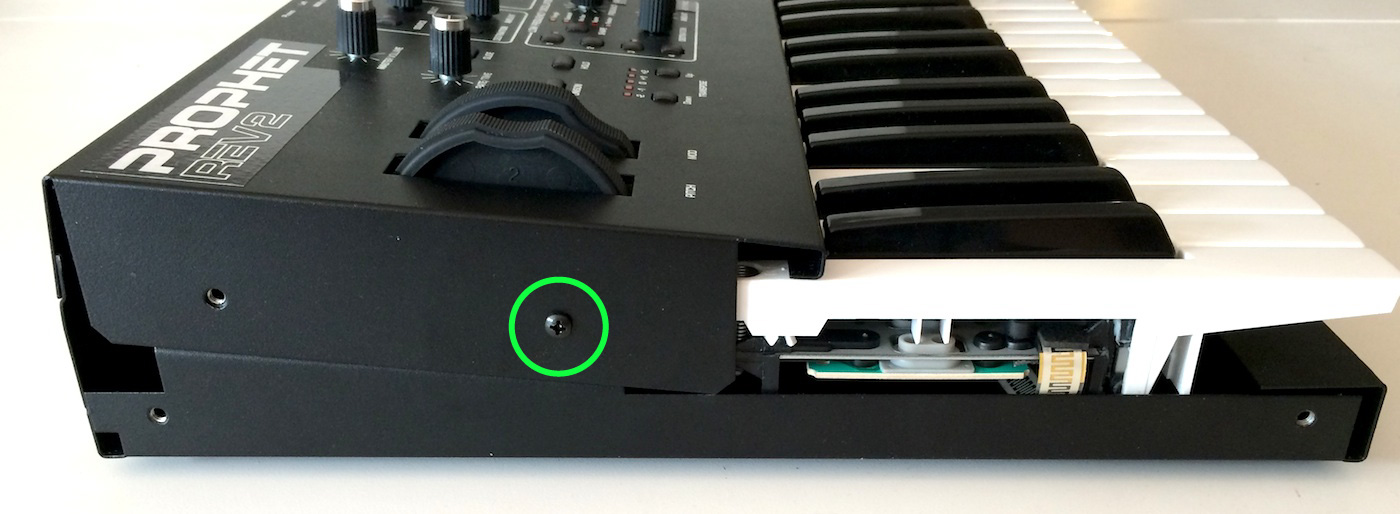
Left Side Panel
Right Side Panel
7. Now remove the 8 screws across the back panel.
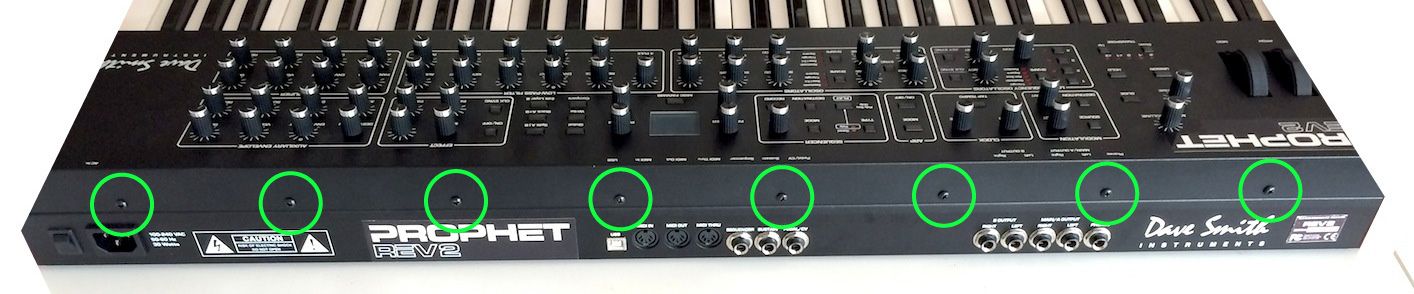
Rear Panel Screws
8. Place a piece of soft material behind the Prophet Rev2, such as bubble wrap, a towel, blanket, etc…
9. The top panel is connected to the mainboard with a ribbon cable. Lift the Prophet Rev2 front panel up and off the unit. Place it face down on the soft material behind the Prophet.
Removing the right panel board:
1.The right panel board has two flat and wide ribbon cables connected to it, one cable going from the right panel board to the left panel board, and one cable connecting the right panel board to the main board. The ribbon cable connectors have locking tabs on either side. Starting with the ribbon cable going to the main board, press outward and down on both tabs simultaneously to release the connector.
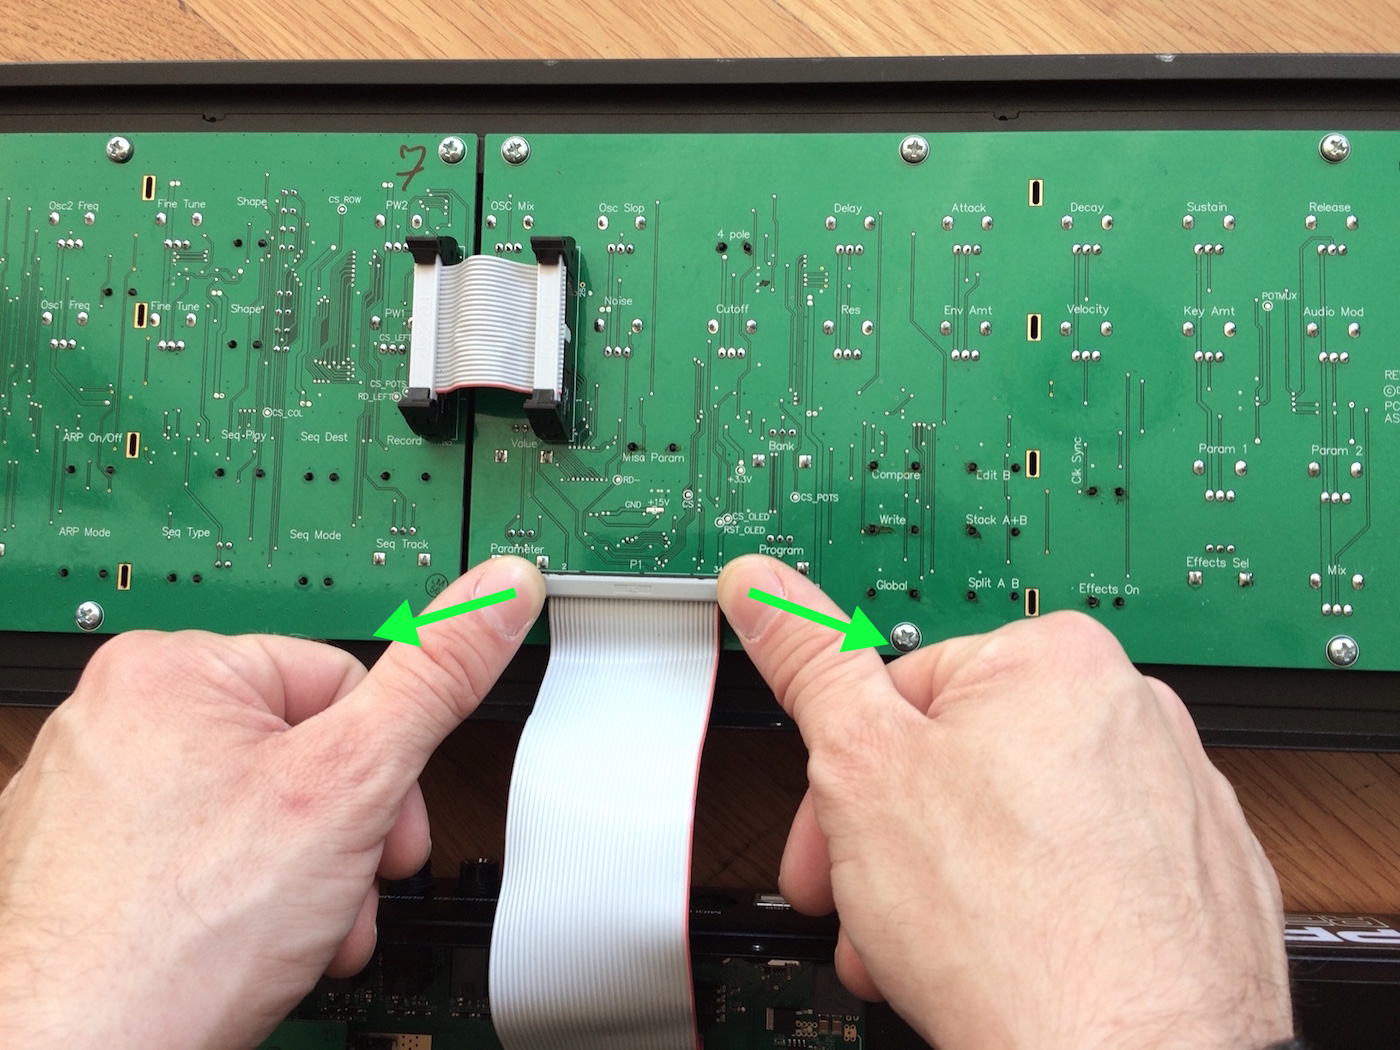
Right Panel Main Ribbon
2. Similar to the previous cable, the panel board connector ribbon cable has locking tabs holding the cable in. Press outward and down on both tabs simultaneously to release it. Disconnect both sides of the cable and set it aside.
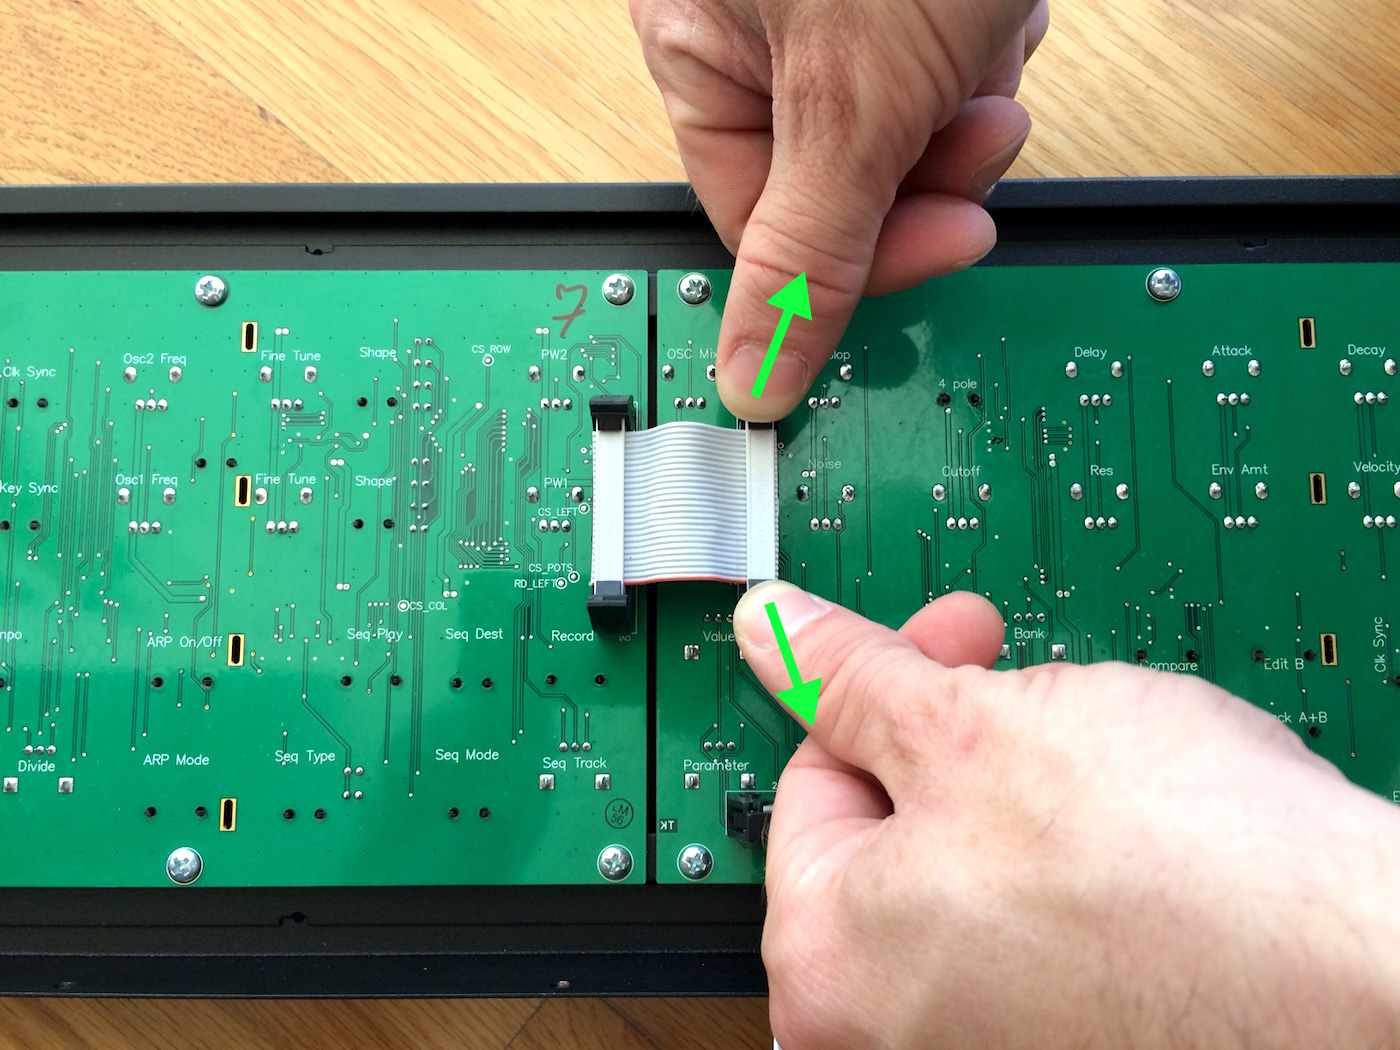
Panel Ribbon Cable
- Note: When reinstalling the ribbon cables, first make sure the tabs are open, then just push the connector straight down and the tabs will close behind it. Push the tabs together to make sure the cable is firmly seated.
4. Remove the 8 silver screws securing the right panel board to the front panel metal. The panel board can now be removed.
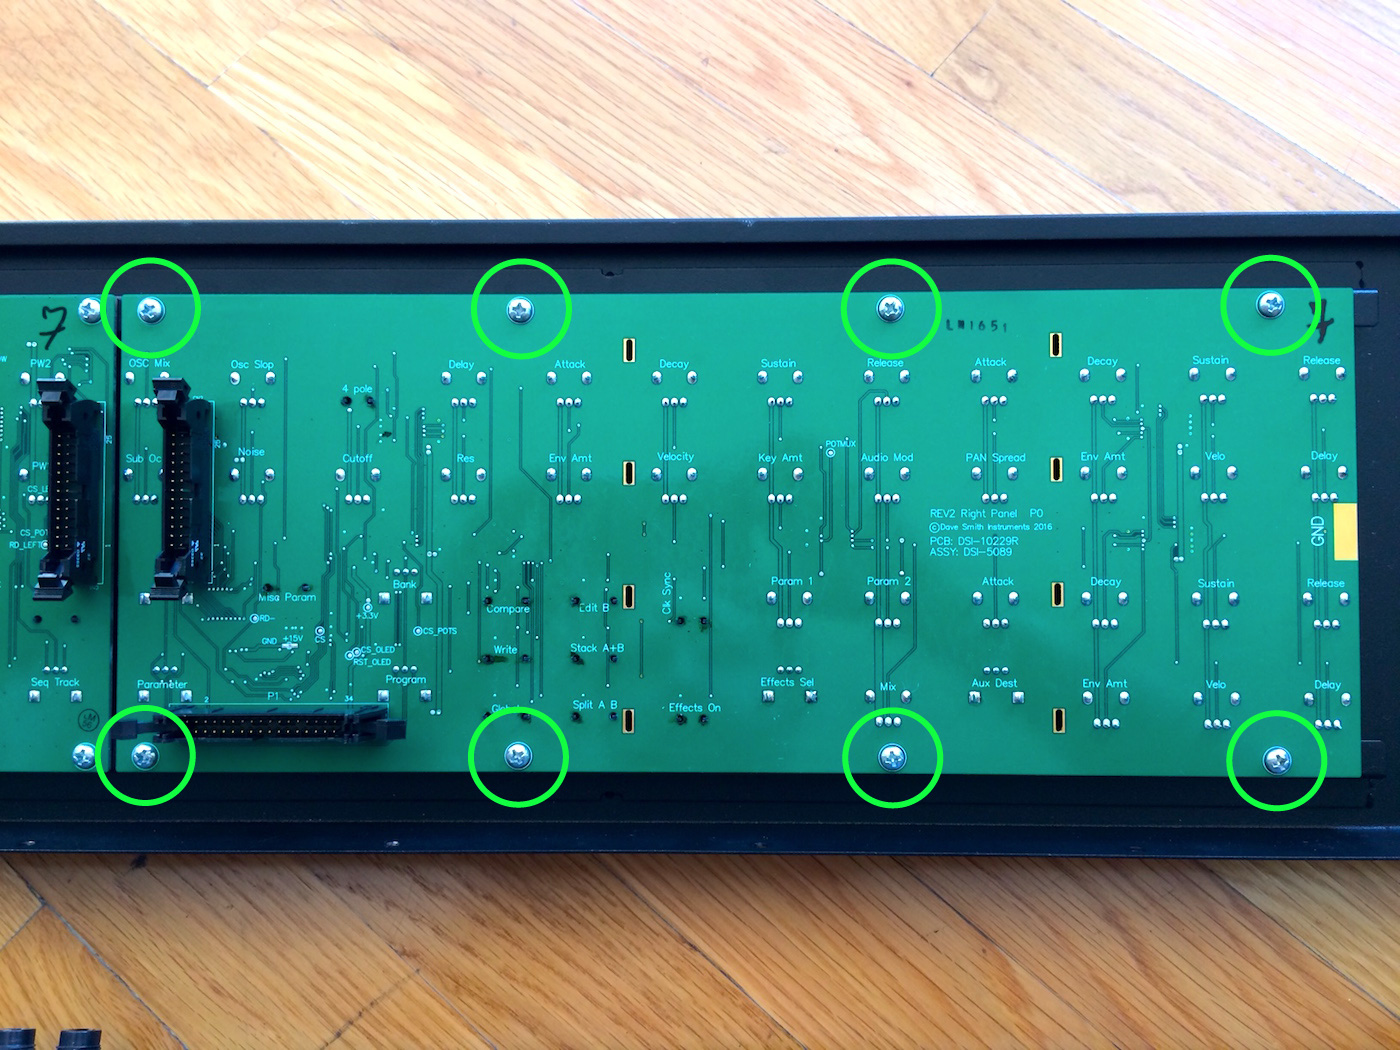
Right Panel Board
OLED Removal (if necessary):
1. The OLED has 2 connectors on the underside, located on the left and right sides and sitting just above center. There is no locking mechanism holding the OLED in place. It is fragile, but easily removed. To remove the OLED, place your fingers under opposite diagonal corners. Applying light upward force, alternate between each corner to slowly pry the 2 connectors free.
To re-install, line up the pins on the back of the OLED with the sockets on the panel board and push down lightly on the OLED directly on top of the pins until it is fully seated. DO NOT push in the center of the OLED.
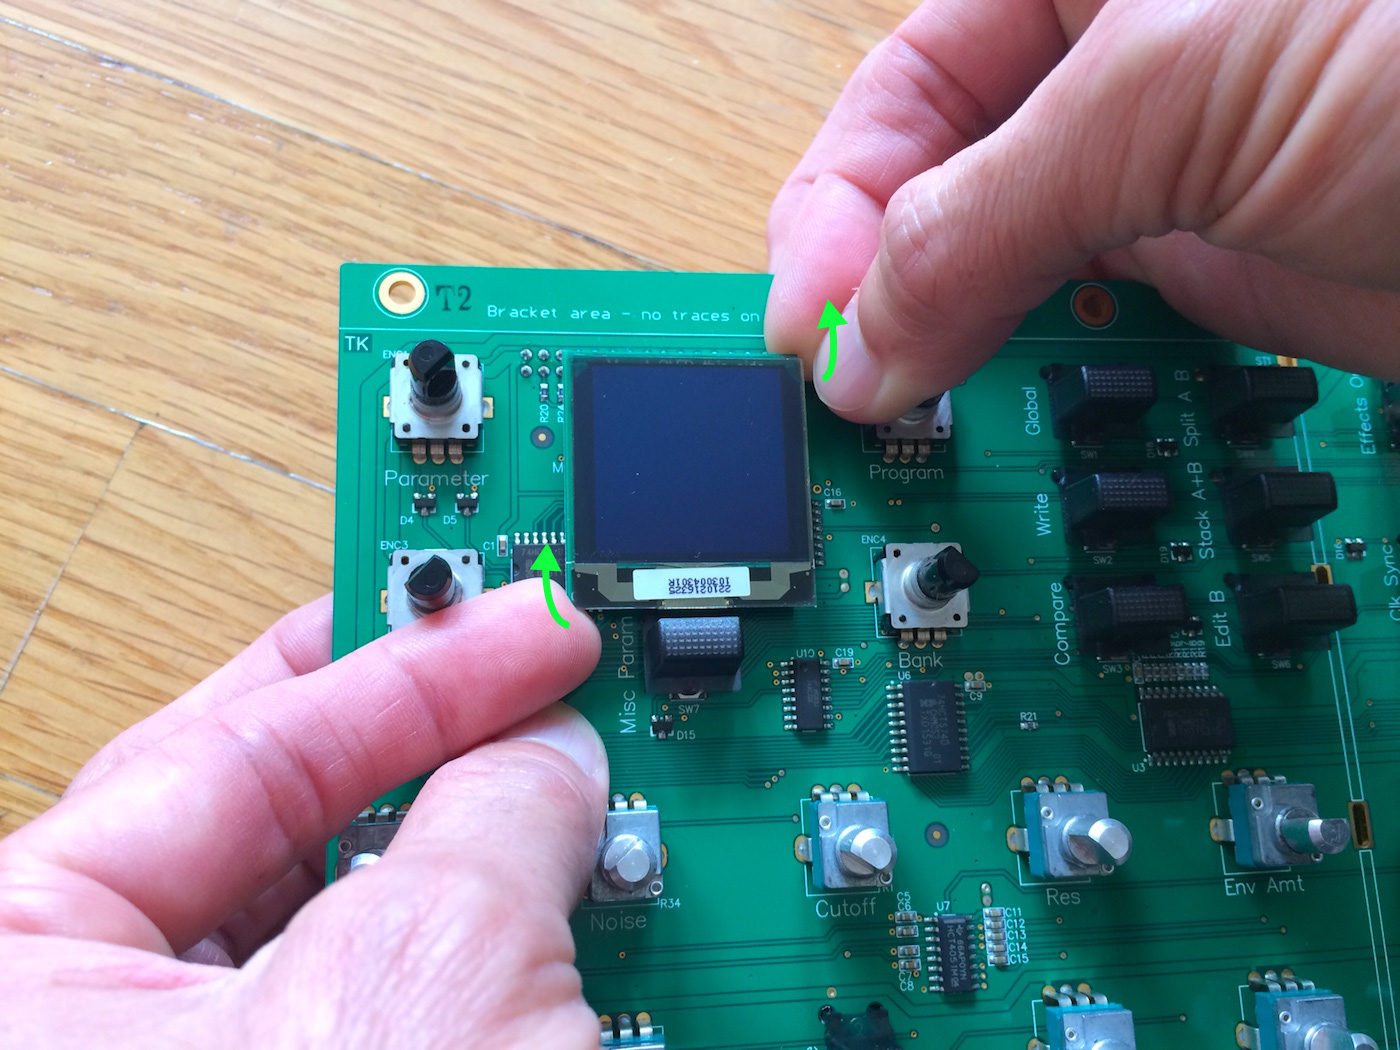
Rev2 OLED
Reassemble the Prophet Rev2 in the reverse order.
Please contact DSI Technical Support if you have any questions regarding the above procedure.